
I am all about creating a life more awesome by, among other things, filling yourself up with happy by doing things you love to do. What better way to start off the Holiday countdown than to show you a few of the things I love to do. Decorating for Christmas and making crafts and handmade gifts are some of the top things on the list fo’ sure. Last weekend I got to craft my heart out at a weekend retreat filled with lots of great ladies all producing crafts and scrapbooking memories. It was sooo fun! Great conversation, lots of laughs and much crafting, what more could a girl want?? This girl was definitely in her happy place.
What was I doing? What did I make? Glad you asked! I can’t wait to show you the great stuff I worked on. Maybe it will give you some crafty inspiration, if it does will you send me a pic of what you made? That would make me smile and send you a huge virtual hug. 🙂 And now on with the show and tell…
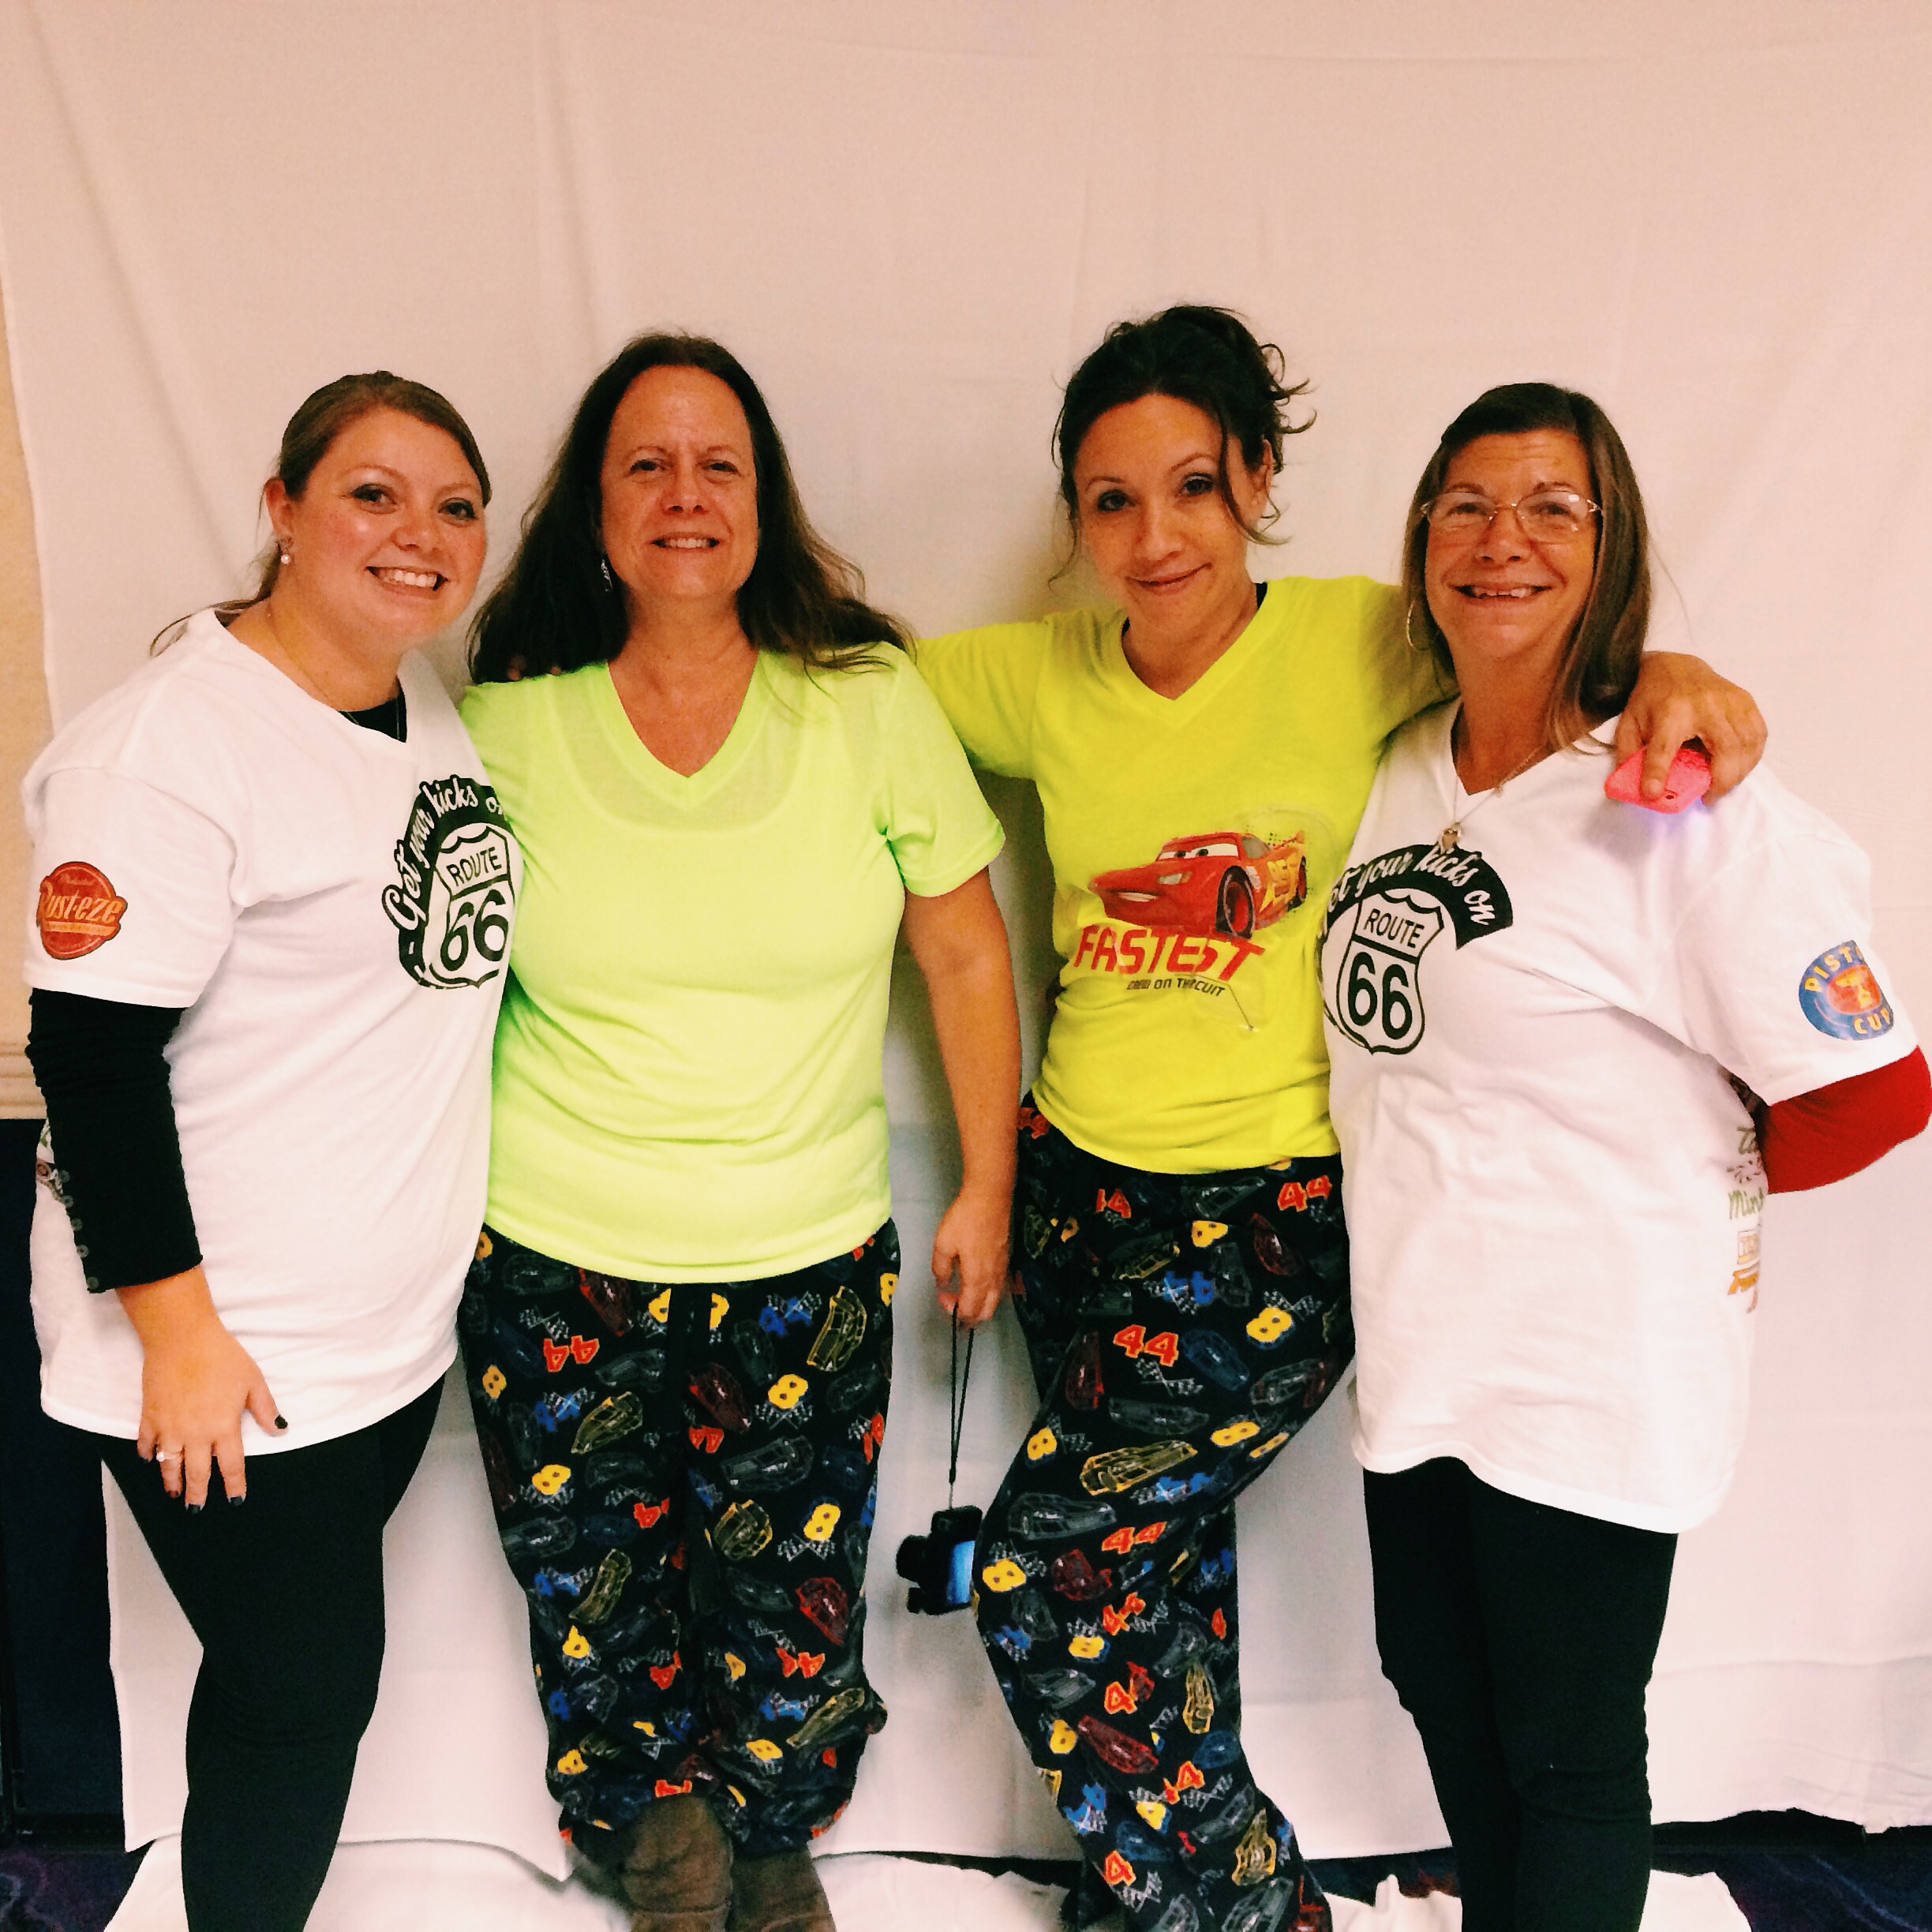
From left to right: Satyn, Jehane, Jen and Carla
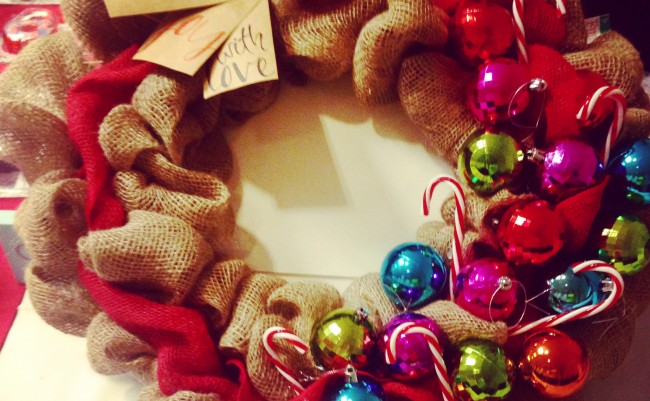
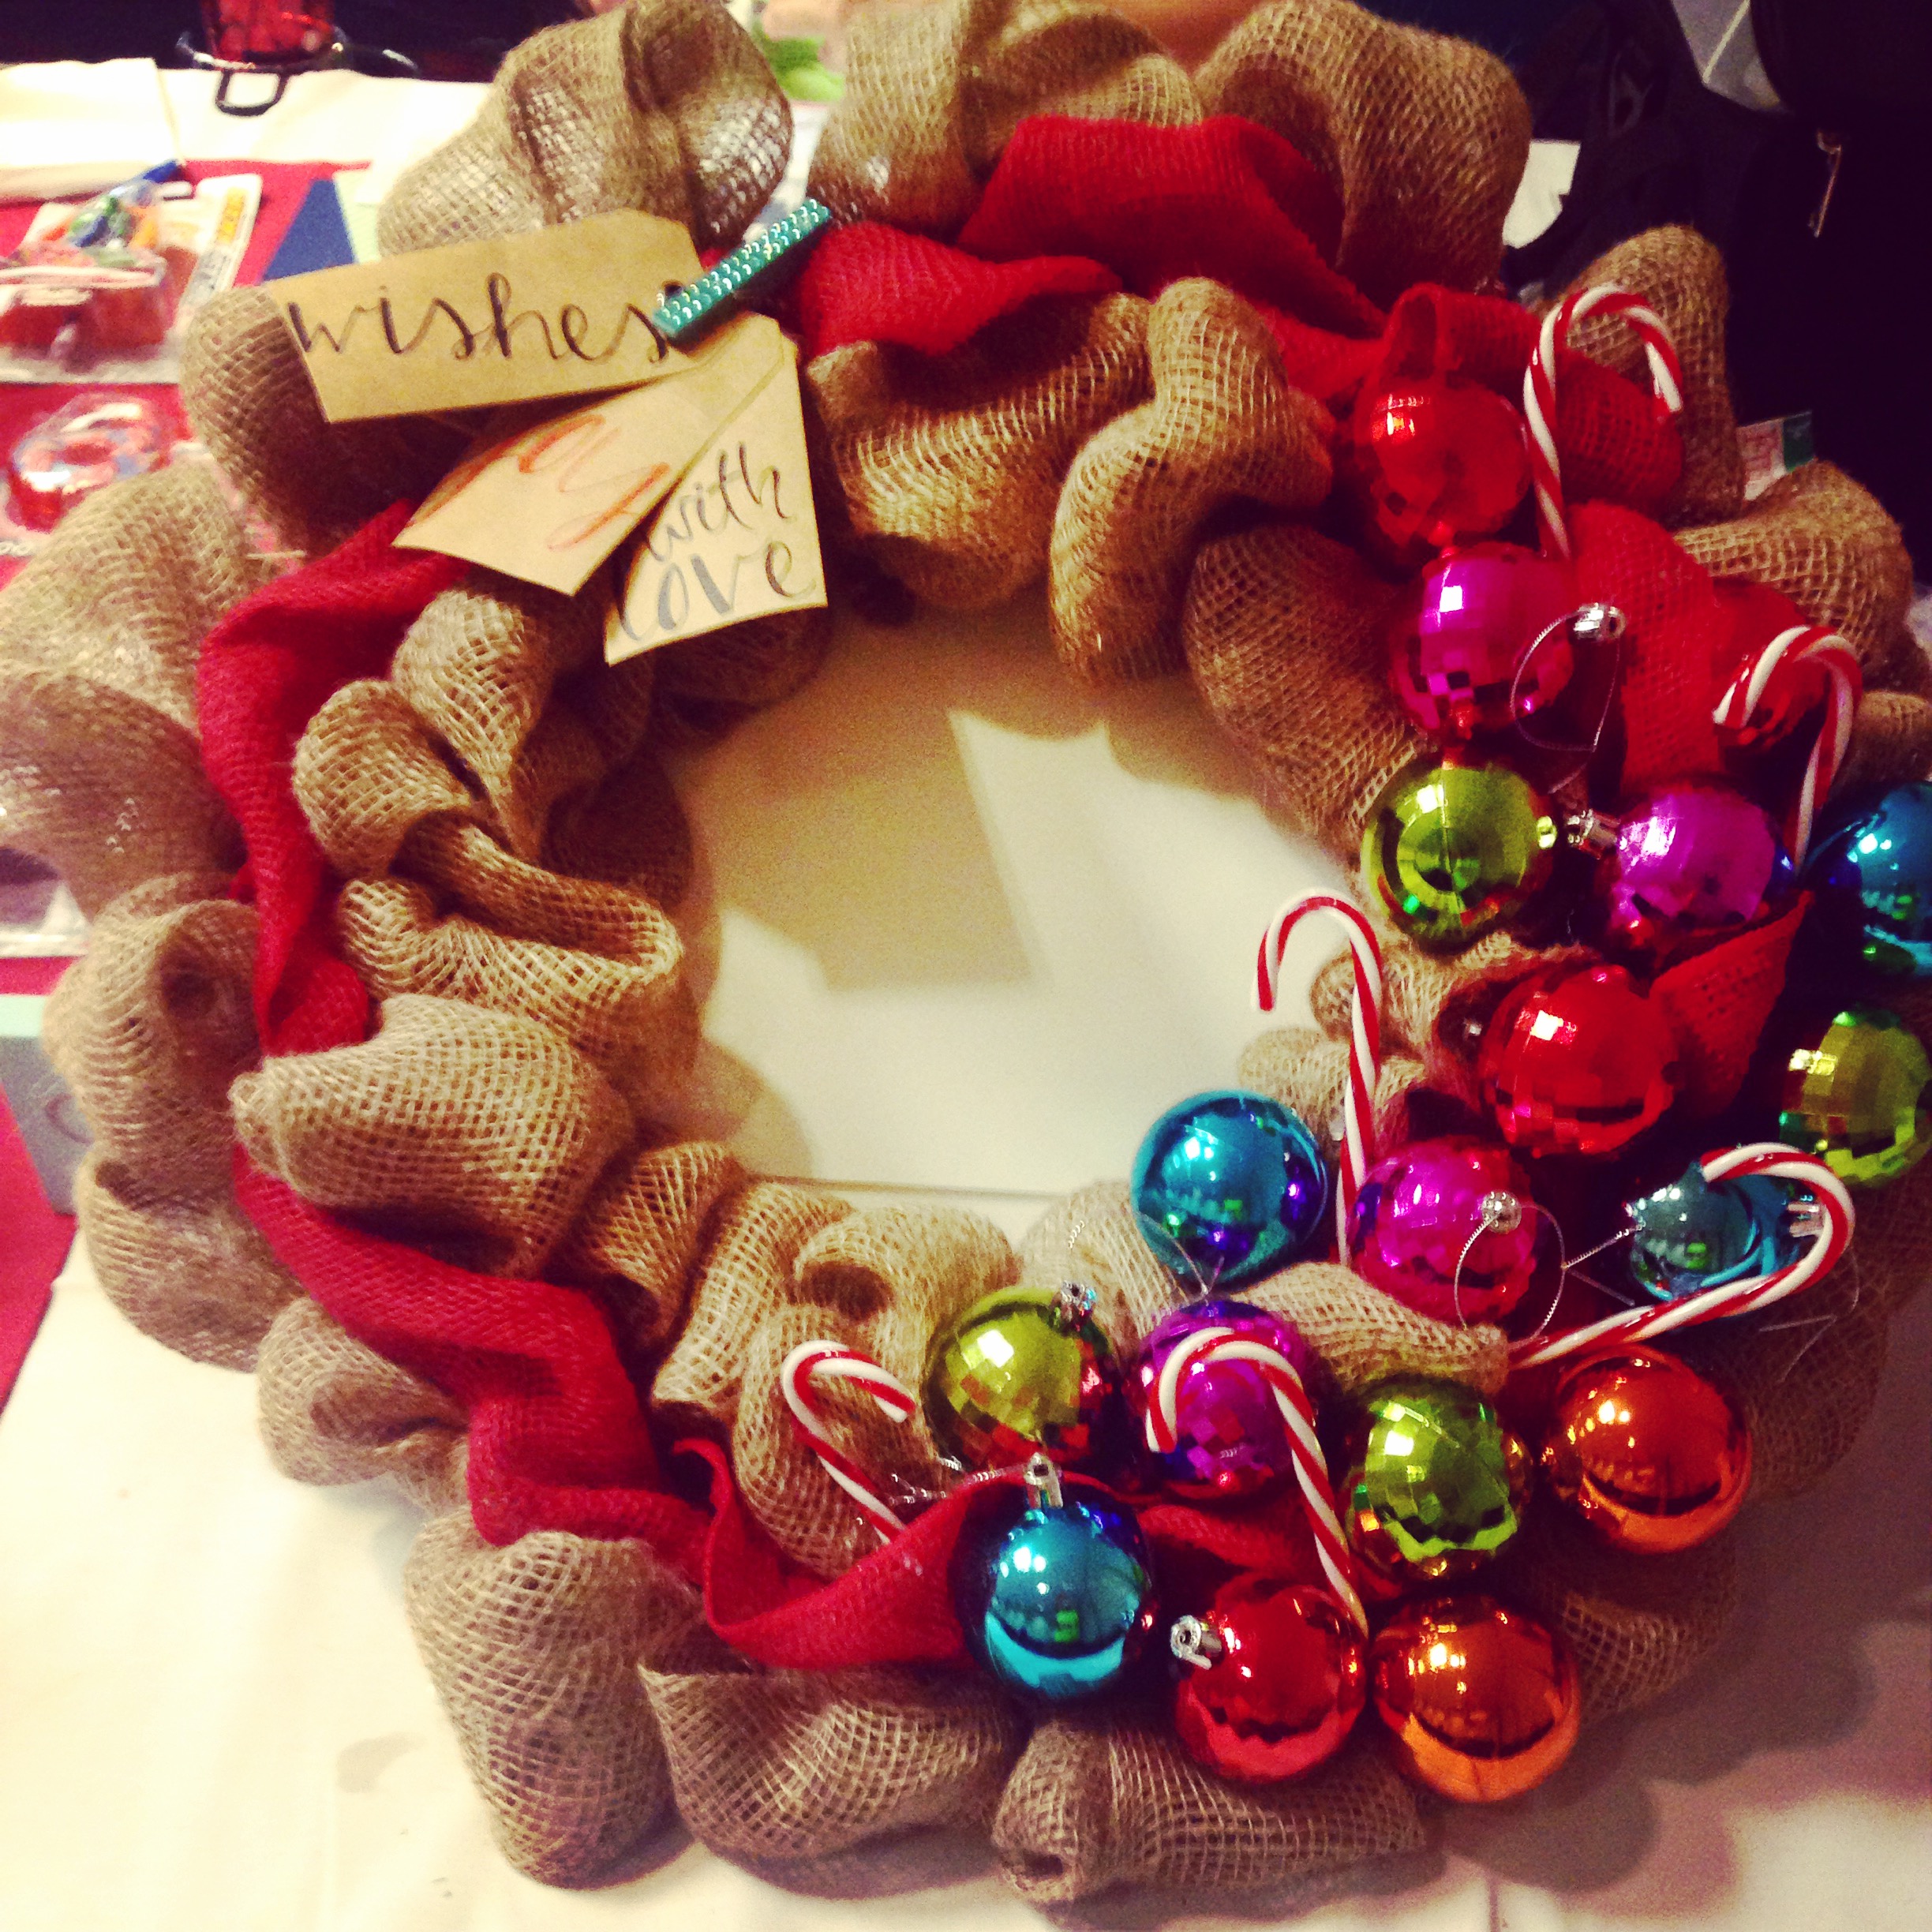
This was so easy to make (once I finally decided how I wanted to lay out the ornaments, special Thank You to Satyn for inspiring me).
Here’s what you need:
*I bought a large bolt of burlap at Lowe’s and cut it into 4 inch strips to save money. How much you need depends on how close together you pack in your loops. The fuller the wreath, the more burlap you use. I would plan on at least 3 or 4 yards.
Here is a great tutorial on how to loop Burlap through a wire wreath (totally ask me questions if it doesn’t make sense).
I basically tucked in the red burlap here and there along the wire wreath so it would stay in place, nothing fancy.
Or whatever else seems like it would look cute on your wreath. I bunched mine together, but you can do what you like, I give you permission. Sometimes I have to remind myself that there are no craft police watching me, I am free to shake things up and color outside the lines. Not sure if others need a reminder, but just in case.
A bow would work great as well. I didn’t have one and I figured I would try something a little different so I used a few cute gift tags and a blinged out clothespin.
TaDa!
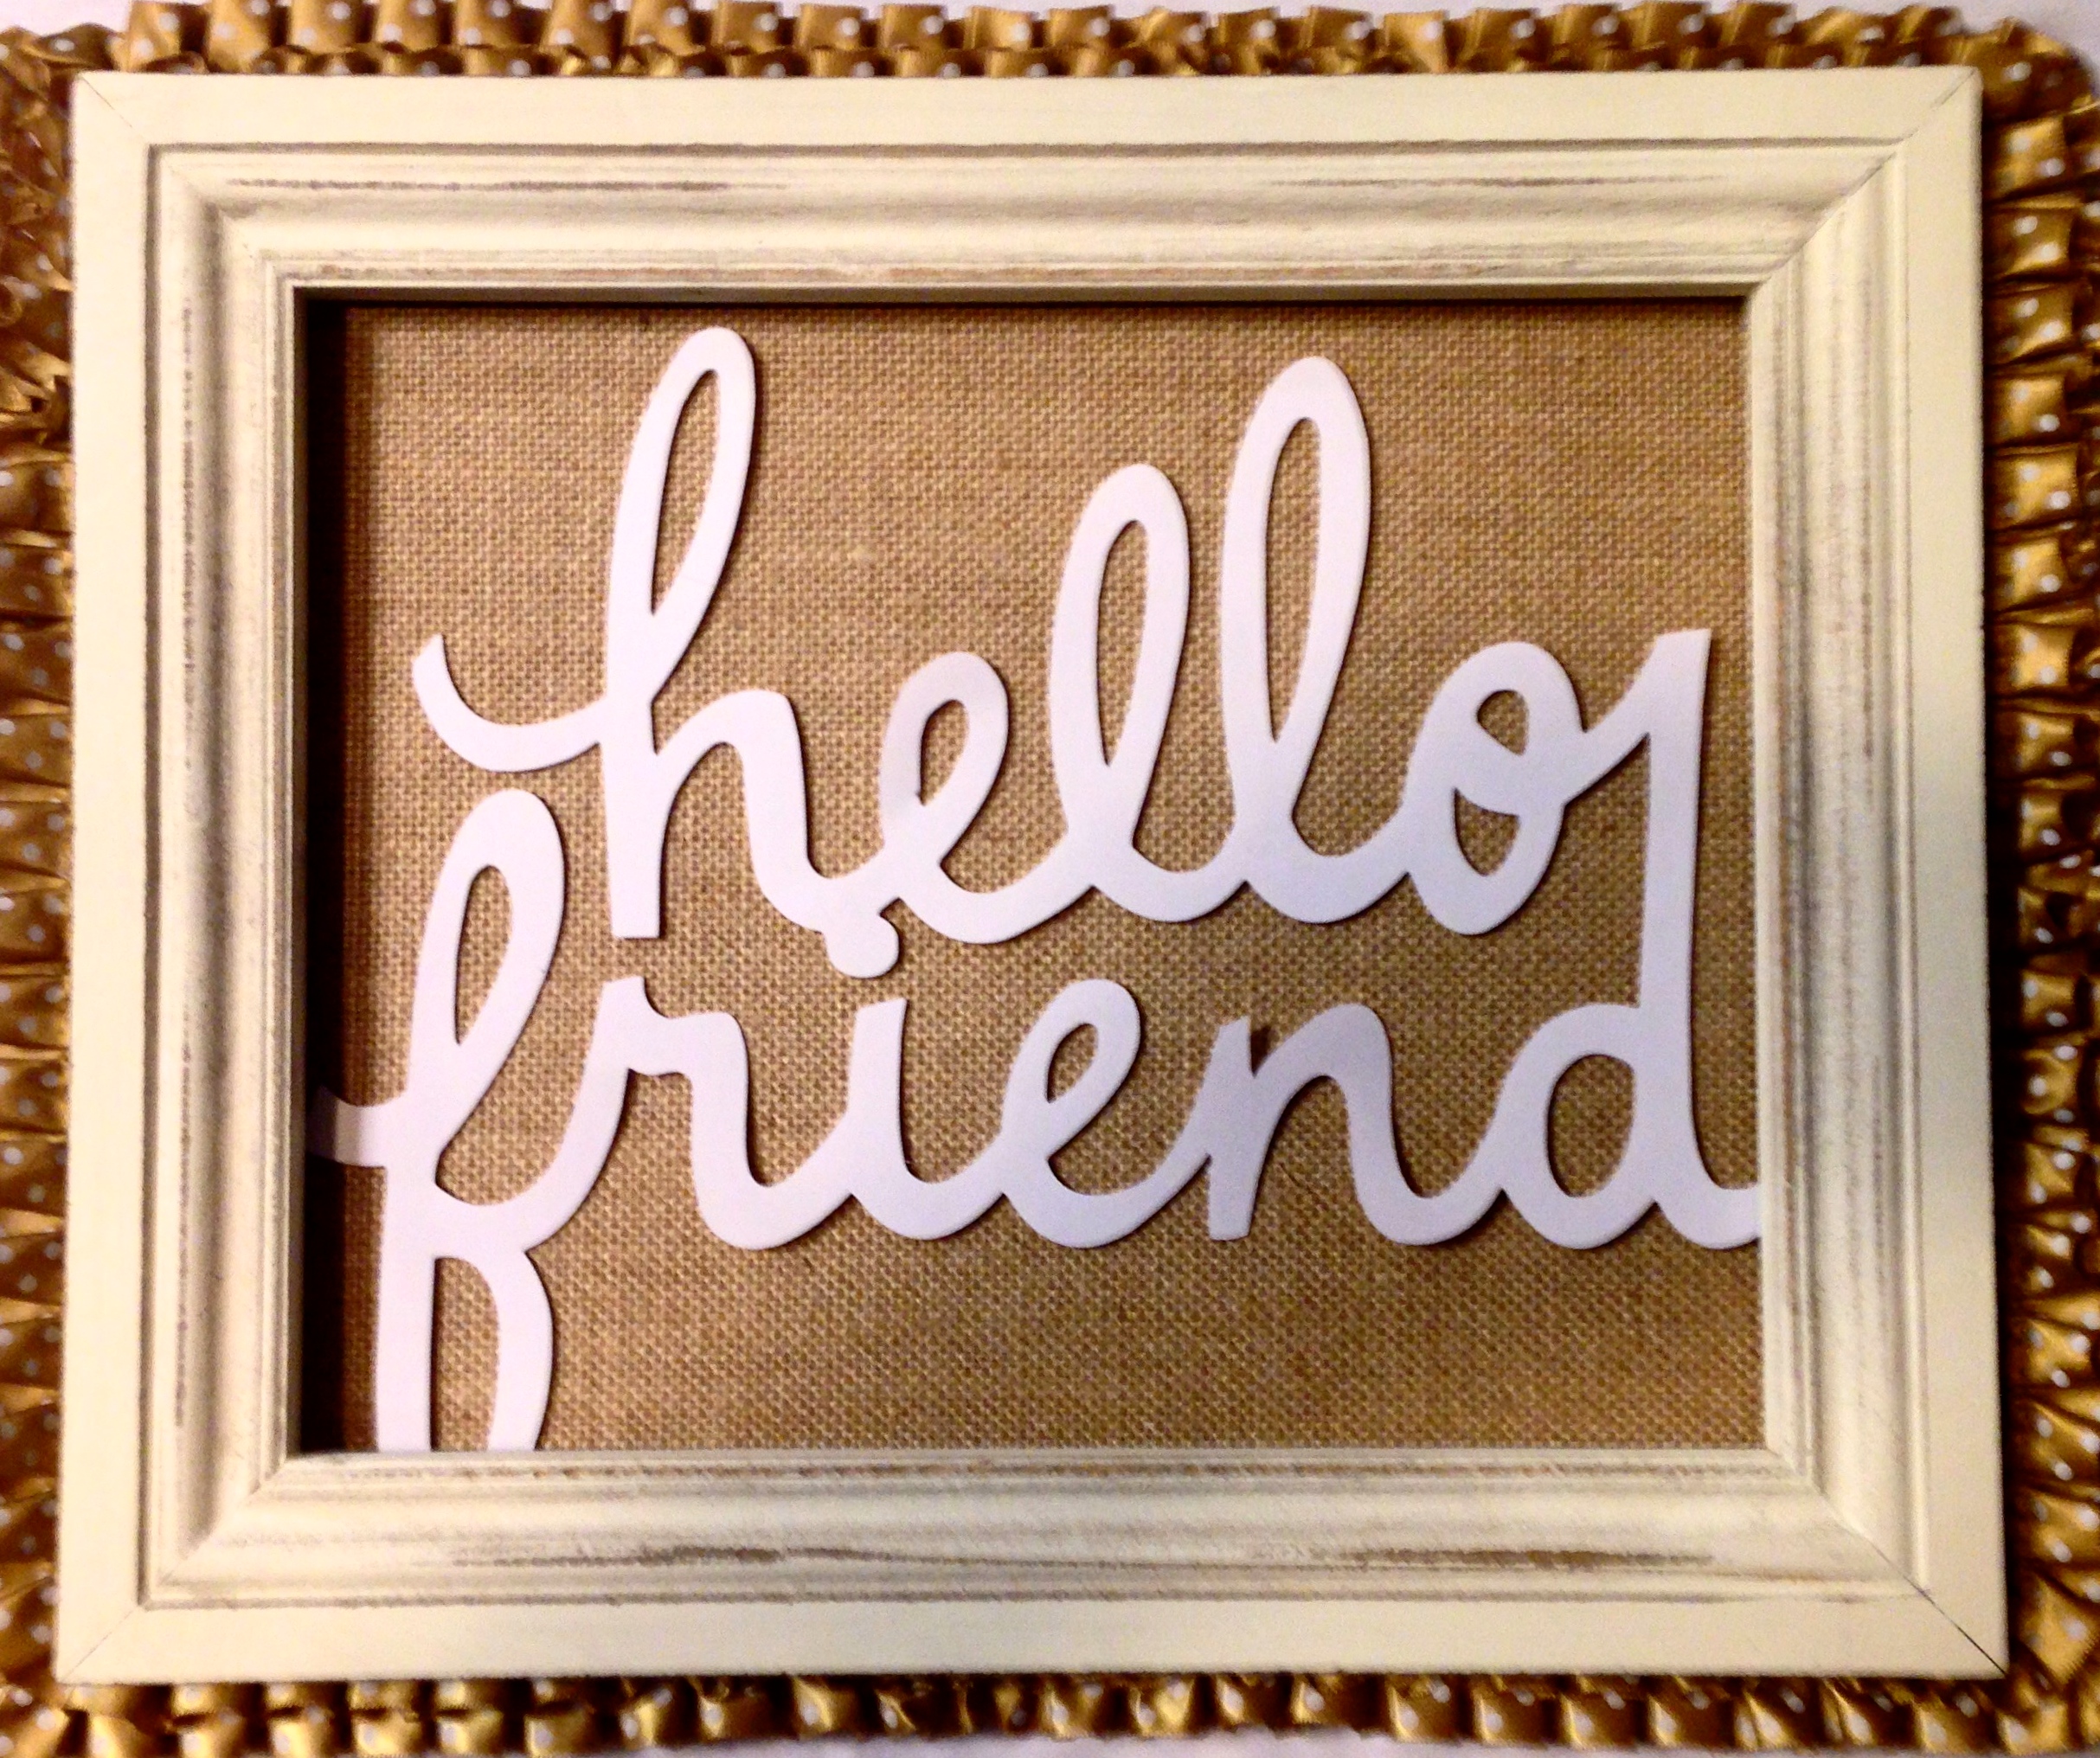
This was also easy and cute to make once I got inspired. I had random supplies with me on the retreat and I kept thinking, “This gold with white polka dot ruffle ribbon is cute, but when/how will I ever use it?” Then, I saw I had a Burlap Canvas (the thin one from Michael’s) and I thought the combo would make cute Holiday decor.
Here’s what you need:
I wrapped it around twice to give it extra ruffle-iness.
Hot glue the 8 X 10 Frame to the center of the burlap canvas, being careful not to crush or hide the ruffle ribbon.
Use glue dots or any other permanent crafting adhesive to glue down your sentiment in the center of the canvas.* That’s it! Tada!
*I wanted to be able to swap out the sentiment based on the Holiday, so I am going to mount different sentiments on think acrylic sheets (so you can still see the burlap behind the acrylic) and pop the sentiments in and out of the frame depending on the season.
You can hot glue a ribbon to the back if you want to hang it on the wall, or you can use those velcro command strips as well. If that doesn’t work, put it on a small easel or plate stand and set it on your mantle. Whatever works!
‘Tis the season to be jolly! Let us remind ourselves to enjoy the little things. Who cares if we can’t buy everything we want, everything our kids want?! I am giving my kiddos the gift of time spent together crafting and baking (whether they prefer this gift or not 🙂 ). I know the memories of the latest toy or video game will fade, but memories of holiday traditions and fun family time will remain (hopefully, right??!!).
xoxo,
Jen
Linking To:
burlap, Christmas, featured, Holiday, sign, wreath


I am here to help you create an awesome life!
We are in this together, and I. CAN'T. WAIT.
We got this!
xoxo,
Jen


I love it Jen!
Bri and I may have to attempt this over the next few weeks. We watched the video, and I gotta say – that woman is either from Newfoundland or Cape Breton. Guaranteed!
I felt like I was in art class with a Mrs. O’Malley or Mister Doyle from here!
xo
K
Lol, good to know! I couldn’t tell where she was from. I thought she did a great job of showing how fun and easy the wreath is to make though! xoxo, Jen
So fun! I want more tutorials! 🙂
Will do!!
This looks super cute!! Woohoo. Thanks for sharing the tutorial.
This will be the first time that I’ve ever not gone home (or to my boyfriend’s parents) for Christmas. We are going to stay home and do our own thing. So, I’m definitely looking for projects to work on to decorate the house. Thanks for sharing and getting my creative wheels turning.
Have a great time, Jennifer! I am sure you will. Take pictures of what you make 🙂
So cute!!! Luv burlap & crafts!!! I may have ot make 1 of these. 🙂
Send me a pic if you make one!! About the logo, no idea why you have an icon rather than a pic. My guess is that it is a wordpress.org vs. wordpress.com thing?? No idea really.
Send me a pic if you make one!! About the logo, no idea why you have an icon rather than a pic. My guess is that it is a wordpress.org vs. wordpress.com thing?? No idea really.
Oh my goodness – why have I never thought to go to Lowe’s for burlap? You may have just changed my life. Thanks for the tutorial, Jen!
I know, right?! There are also bolts (sp?) of it at Joanne’s with polka dots, chevron stripes, etc. already on them as well.
Jen, you ROCKED these tutorials! I am so impressed! The only thing I wanted, was more photos, but take that with a grain of salt from me, as I tend to probably give too many shots. 😉 I love how you did the “step by step” and made it so easy to follow! The video was great. My fave part was the candid photo of you and your girls in your pajamas! Too cute! Nice, nice job, Jen! I hope you do tons more! ♡
Yes, more pictures, I know, good feedback 🙂 For some reason, I am afraid of crashing the blog post with too many pictures, but I know it is all in my head. Next time, more pics!!
This looks so perfect! I love it! Pinned and tweeted. Thank you for being a part of our party. I hope to see you on tonight at 7 pm. It wouldn’t be a party without you!
Happy Monday! Lou Lou Girls
Thanks, Kimmie! Can’t wait for tonight, thanks for the party 🙂 xoxo, Jen
Great tutorial Jen! I love that wreath. I also really love the fancy burlap at Joanns 🙂
You are so right about toys being forgotten but traditions are remembered always. We make candy to give at Christmas every year. My kids are 20 something and we have to schedule ‘candy making night’ now, but it is still as awesome as ever and our “thing”.
xo!
rs
Aww, I love that Richelle! Hope to be doing the same thing when my kids are in their 20’s! xo, Jen
[…] My girl Jen shared a wonderful tutorial for some DIY holiday decor, a darling burlap wreath and a cute little burlap ribbon trimmed frame. Check it out at her blog devoted to living a life more awesome, “Jen & Company” […]